10 Projects That Make Colored Pencil Drawing Easy for Everyone
Introduction
Welcome to the World of Colored Pencil Drawing
Based on my experience, I am confident in saying the colored pencil is a magical instrument of visual art. It’s a medium that’s capable of portraying the wonders of color, is easy to use and clean. You can see my love for colored pencils just by looking at my social media avatars! Realize the spectrum of a colored pencil collection and it’s ability to open your imagination to art. Imagine pulling from a rainbow to draw a vibrant vision from the depths of your imagination. This is the artistic dream that colored pencils offer. With knowledge of how to wield this amazing tool, your visions will soon appear on a 2-D surface. Ready to harness this power of color? Then let’s explore how to make colored pencil drawing easy.
Why Colored Pencils Are Perfect for Beginners
For beginners, colored pencils offer an approachable, low-pressure medium to start building artistic confidence. Unlike paints or inks, they’re easy to control and don’t require a lot of preparation. You can layer colors to build up rich tones, blend smoothly for gradient effects, and erase mistakes without too much stress. The best part? They’re portable! Whether you’re sketching at home or on the go, colored pencils provide a perfect way to hone your skills while staying flexible. They’re forgiving, fun, and full of potential.
How These Simple Projects Will Build Your Confidence
Jumping into large, complicated drawings can feel overwhelming, but starting small with easy, manageable projects makes the process far more enjoyable. Each project in this guide has been designed to help you grow, step by step. From basic shapes to fun fruit illustrations and charming cartoon animals, these exercises will boost your artistic confidence without requiring advanced skills. By mastering these approachable techniques, you’ll soon find yourself capable of creating more intricate and detailed pieces, all while enjoying the satisfaction of watching your art evolve.
Basic Geometric Shapes with a Splash of Color
Start with Simple Circles, Squares, and Triangles
Before you leap, you’ve got to use patience and crawl first! Patience is one of the most valuable traits you can have as an artist, especially with the colored pencil. With that said, begin using a simple approach by drawing simple shapes. In other words, refrain from shading for now and just draw using lines. Shapes are the foundation of drawing, not just the act of putting pencil to paper but seeing as well. You must be able to see objects in nature and simplify them as simple shapes that interlock with each other. Once you are able to identify those shapes, it makes colored pencil drawing easy. Angles, distance, length and width will become second nature to your mental and visual approach to drawing with the practice of simple shapes.
Learning Shading Techniques with Basic Shapes
Now that you’ve become acquainted with the basics of drawing shapes, it’s time to move on to shading. With the colored pencil, you have the ability to achieve some unique shading results. With practice, you begin to learn how to create the illusion of depth in your artwork. Shading with colored pencil can be applied as a thin layer or a multi-layered work of art. To begin, observe and draw a simple shape in your studio, such as a ball, square or cylinder. Next, start shading the shape you drew by using a colored pencil to represent the darkest darks you see. At this stage, you will notice the unique texture created by the shading you create. Keep shading as you study the shape in front of you, going from the shadows, to the midtones and lighter tones. Use the pressure of your hand on your colored pencil to control how light or dark the strokes appear on your paper.
Adding a Creative Twist with Color Gradients
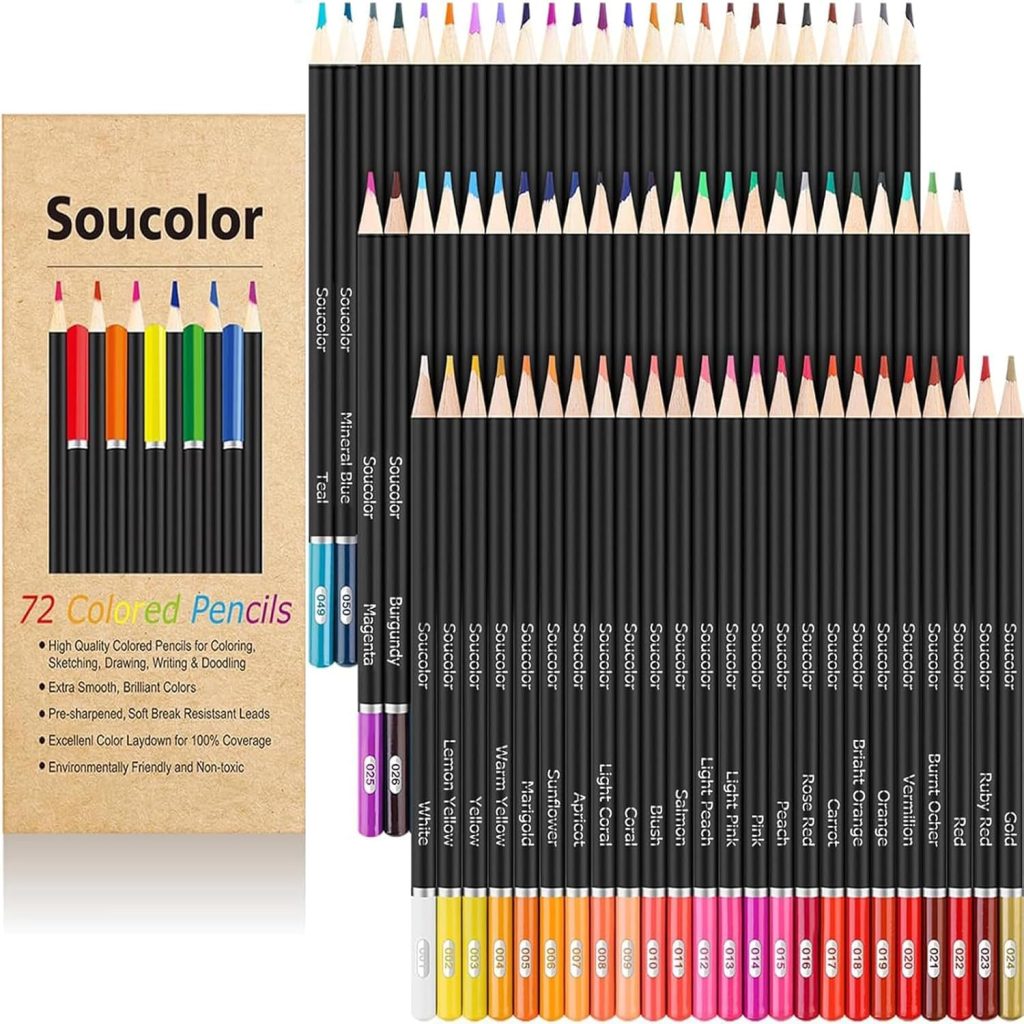
As a kid who drew realistically, I didn’t realize how much further I could get in shading had I just used a gradient tool. For the most part, I just used to shade and create color gradations based on my observation. But then when I started studying art on an advanced level in college, I was introduced to color and value measurement tools. Allow me to help you progress further by recommending that you use a gradient tool. As a result, you’ll understand how to achieve the beautiful blending effects that the colored pencil is known for. Make colored pencil drawing easy using the Munsell Value scale, a color gradient tool. In colorimetry, the Munsell color system is a color space that specifies colors based on three properties of color: hue, value, and chroma. Refer to this gradient tool while you’re shading in order to understand how color and value blend into one another. Then replicate that shading to your liking on paper. In addition, study colored pencil artists who you admire and their approach to using the tool. Each artist has their unique way of using it, so you can gain a lot of inspiration from observing them.
Easy Flower Drawings to Brighten Your Day
Something about the beauty of the flower lends itself well to the brilliance of the colored pencil. I have had the pleasure of viewing numerous works of art in colored pencil which portray floral arrangements. Just imagine capturing the delightful color of a bouquet or a single daisy on a sunny day. With this unique art material, it’s possible to reproduce the wonder of botanical life. Here are some ideas on how to approach flower colored pencil drawing easy.
Step-by-Step: Drawing a Simple Daisy
Daisies are the perfect starting point for a flower drawing because of their clean, uncomplicated structure. Begin by drawing a small circle in the center of your page. This will act as the daisy’s core. Around that circle, lightly sketch elongated ovals—these will form the petals. Keep each petal equidistant, curving them gently to give your daisy a more natural look. Once you’ve outlined the flower, use colored pencils to fill in the center with a rich yellow, and give the petals a light, delicate touch of white or pale pink. Don’t worry if each petal isn’t identical—nature is beautifully imperfect! Allow a bit of irregularity in order to make your drawing feel more natural.
How to Add Depth with Layering Colors
As I stated earlier, layering is one of the unique options you have in colored pencil shading. Start by gently layering lighter colors like soft pinks or yellows over the petals. Then, build up with darker shades along the petal edges to create subtle shadows. As you layer on paper, you’ll notice the shading will become thicker and the color richer. As Ewelina Wajgert mentions in her spring crocus tutorial, “Start lightly to build the form gradually, and add darker details later.” Applying this technique to your daisy will make it appear as though the petals are reaching out of the page. For the center of the flower, adding hints of orange and brown around the edges can help highlight its texture and give the flower a more vivid, lifelike appearance.
Play Around with Different Types of Flowers
As you’ve probably observed, there are so many types of beautiful flowers in nature to choose from. Once you’re comfortable with drawing daisies, feel free to draw other species of flowers. For instance, draw a rose posed against a dark background on top of a solid color table that is illuminated. This setup where you pose an inanimate object is known in art history as the “still life”. In addition, try drawing sunflowers or orchids in a similar type of still life setup. Whichever you choose, start with a single flower first before attempting to draw a whole bouquet. Above all, maintain a simple mindset and approach to your subject in order to make colored pencil drawing easy.
Fun Fruit Illustrations That Pop
Drawing fruit is one of the most enjoyable ways to explore the color, texture, and shading of the colored pencil. Whether you’re a beginner or a seasoned artist, drawing fruit offers endless opportunities to play with vibrant hues and realistic shading techniques. Furthermore, the simplicity of fruit shapes help to make colored pencil drawing easy. Plus, the results are always fun and satisfying! Let’s dive into colored pencil drawing easily with fruit illustrations that jump off the paper.
Create a Lifelike Apple in Just a Few Strokes
An apple is the perfect starting point for a fun, lifelike fruit illustration. Begin by sketching a basic round shape with a slight dip at the top where the stem sits. Then refine your drawing of the apple by improving the accuracy of it’s angles and curves. Next, the key to making the apple look real is all in the shading. Start by lightly shading the body of the apple with a red pencil, leaving the highlights of the apple blank to represent the natural shine that fruit often has. Gradually build up layers of color, using deeper reds around the edges and blending lighter tones towards the center. Add color shifts as you shade the apple’s surface to indicate any color reflections from the environment. Remember, use the pressure of your hand against the pencil and paper to control the dark and lightness of your shading. With enough practice, you can create an apple that feels as though it’s ready to be plucked from the page.
Adding Shadows to Make Your Fruit Look Real
Shadows are the secret sauce to making your fruit drawings appear more three-dimensional. While observing your apple, observe where the light would naturally hit the surface. Opposite the light source, darken the area slightly to create a shadow. Use a dark red or even a hint of brown to give the apple depth and weight. For the stem, add a shadow underneath it to show that it’s casting a slight shadow on the apple’s body. The contrast between light and dark will instantly give your fruit a realistic, tactile appearance. You’ll be amazed at how a well-placed shadow can transform a flat image into something dimensional.
Try Your Hand at Other Fruits: Bananas, Grapes, and More
We are now at the stage where your subject matter will get more complex. If you’re ready to meet the challenge, push yourself to the next level by drawing bunches of fruit. In the history of art, many of the masters have used bunched fruit as their subject matter. The truth is, a combination of various fruits is pretty interesting and unique visually. However, if you feel you aren’t yet ready to take on that level of complexity, stick with one or two fruits. For starters, hit your local supermarket and choose from a fruit that is most attractive to you. Grapes are not only a simple shape, they have a unique translucent quality to their skin. Or maybe you prefer to capture the texture of a cantaloupe’s rind. Watermelons provide a great opportunity to experiment with capturing various tones and shapes. This sweet treat offers challenging opportunities to draw the black shapes which overlap it’s shell. Whatever fruit you choose, do so based on it’s level of detail. As a result, you have control over making colored pencil drawing easy.
Cartoon Animals for Quick and Cute Results
Cartoons were my main source of artistic inspiration as a kid. No matter what age you are, I believe they can also be an ongoing source of inspiration for you too. Truthfully, cartoons can make us happy by the playful expressions and character they have. Plus, cartoon animals are usually beyond cute. That visual delight plus their unique look can provide hours of fun at the drawing table. Let’s take a look at what makes colored pencil drawing easy with cartoon animals.
Drawing an Adorable Bunny in Simple Steps
Whether it’s a little kitty or a cute bunny, you’ve probably got that one mammal that is your favorite. Start there, and find your subject animal to draw from either in a photograph or real life. Grab your colored pencil and paper and start with a sketch of the basic shape. Do your best to capture the general shape, rather than starting with small details. The way to draw anything effectively is to start big, then work your way down to the smaller details. For example, begin sketching a bunny’s round body and the various circular shapes that comprise it’s head. With those primary shapes drawn, use them as a guide to draw your smaller details. As you draw the floppy ears, eyes and nose, compare the distance between and angle of one shape to another. By carefully measuring and comparing each drawn line and shape, you’ll eventually draw something which resembles that animal you see.
How to Use Colored Pencils to Add Personality
Fortunately, colored pencils offer the artist flexibility to discover a range of visual character and texture in drawing. Depending how you apply your strokes and layer, this art medium helps an artist to explore different visual styles. Furthermore, the vibrant glow of colored pencils brings personality to the objects you draw. From cross hatching, single-layer shading or multi-layered coloring, colored pencils offer artistic versatility. As stated before, study what you’re visually attracted to in a style of colored pencil art. Then use that as your inspiration to apply those techniques in your studio. Choose to keep it simple with one or two layers of color like Thaneeya, or go for a multi-layered approach. Whichever choice, this art medium will allow you to find your unique artistic voice.
Experimenting with Different Animals: Dogs, Birds, and More
Break boundaries and take the leap as an artist by exploring more mammals as your subject matter. After drawing a bunny or cat, you should now be acquainted with the basic shapes of small animals. Use that experience to draw other types of animals in cartoon form. Cartoon animal drawing provides hours of fun. Their fluffy tails, cute ears and eyes will soon become embedded in your brain as you draw each one. By drawing cartoon animals, you can keep it simple, have fun and focus on the basic shapes. As a result, you gain the know-how to graduate into drawing them realistically later. This is the process of how I learned to draw as a child. Basic shapes and cute animals allowed me to progress in drawing at a gradual pace, rather than rush into photo-realism. Many have the misconception that in order to “learn how to draw”, you must shoot for realism right away. Get that idea out of your mind. As a student of art, you must crawl before you walk.
Create a Scenic Sunset with Just a Few Colors
Sunsets are one of the greatest sights on Earth and a great subject for colored pencil drawing. I recommend that you go for a multi-layered shading approach to capture this scenery. Grab your camera and capture a sunset you enjoy or work from someone else’s photo as reference. Either way, it’s quite satisfying to reproduce the magical glow of a sunset using colored pencils. Below are ways to approach colored pencil drawing easy with a wonderful sunset as our subject matter.
How to Capture the Glow of a Sunset in 4 Easy Steps
Perceive the glow of a sunset as a transition of vibrant colors. Start by lightly shading the top of your page with deep purples or blues to represent the fading sky. As you move downward, gradually blend in rich oranges and soft pinks, using lighter pressure to create smooth transitions. The trick is to let each layer softly melt into the next. Continue layering the colors, with the lightest tones at the horizon where the sun is setting. Finally, use a bright yellow or pale white for the sun itself, softly radiating outwards. This is just an example of how to approach blending of the colors. In reality, your sunset may differ in some ways than this example. Hence, use your eye to the best of your ability.
Blending Warm Tones for a Smooth Finish
Keep in mind, the secret to rendering the tones of a smooth, radiant sky is in the blending. Use warm tones like orange, peach, and pink to replicate the sky’s glow. Begin with soft strokes, layering the colors one on top of the other. Use a blending tool, or even just your fingers, to smudge and merge the transitions between each color. This creates that dreamy, seamless effect where the hues melt into one another. Don’t be afraid to overlap shades, allowing the richness of the orange to fade into delicate pinks. As you build up your layers of shading, the color of your shading will become more vibrant. Hopefully these steps help to demystify the drawing of sky scenes and make colored pencil drawing easy.
Adding Silhouettes for an Extra Touch
One way to elevate your sunset drawing is to add silhouettes in the foreground. For example, a lone tree, a distant mountain range, or a group of birds flying across the sky. These dark shapes provide contrast and make the colors of the sunset stand out even more. To create silhouettes, simply use a dark colored pencil to sketch simple outlines of objects against the light background. The trick is to keep them sharp and clean. A solitary palm tree against a glowing sky, for instance, adds a tropical touch and a sense of depth. This small detail is what will give your sunset that final polished look, grounding it and adding a layer of intrigue to your drawing.
Personalized Name Art with Fun Colors
Personalized name art is more than just writing—it’s about turning your name into a vibrant work of art that reflects your style and personality. Whether you’re creating a fun piece for your room, a gift for a friend, or just trying out a new creative project, playing around with color and design is key to making your name pop. In addition, personalized name art is a good artistic approach if you are also an aspiring graphic designer. Drawing letters is an advanced drawing technique that requires practice and coordination. Let’s explore how to choose the right style, use color effectively, and add some decorative flair to bring your name art to life.
Block Letters vs. Script: Choosing Your Style
Personalize your name art using a lettering style that fits your persona. Block letters are bold and sturdy, offering a lot of space to fill in with colors, patterns, and textures. They’re ideal if you want a modern, graphic look or something playful. On the other hand, script lettering flows with elegant curves, giving your art a more delicate, sophisticated feel. Script is perfect if you’re going for something softer, more whimsical. Think about the mood you want to set—whether it’s clean and sharp or flowy and elegant, your lettering style is the foundation that sets the tone for the entire piece. Keep in mind, lettering can improve your drawing ability. However, don’t feel compelled to rush into this advanced technique if you’re not ready.
Using Colored Pencils to Make Your Name Stand Out
Colored pencils are the perfect medium to give your name art that extra burst of energy. When filling in your letters, experiment with gradients—start with a darker shade at the edges of each letter and gradually lighten the color toward the center. This creates a dynamic, three-dimensional effect that makes the name stand out. Don’t be afraid to mix and layer colors for added depth. Try combining unexpected colors like teal and coral or fuchsia and lime green to make your name look fresh and original. You can also use metallic or neon pencils for a bold, shimmering effect that makes your artwork feel alive. Play with different textures and shading techniques to add uniqueness to every letter.
Adding Borders and Embellishments for a Personal Touch
Once your name is beautifully colored, it’s time to make it even more personal by adding decorative elements. A border around your name can frame the artwork and make it feel complete. Try drawing simple geometric shapes like squares or circles, or opt for something more playful like swirls or zig zags. To give it a unique flair, add embellishments like stars, hearts, or small doodles that relate to your hobbies or interests. These small touches bring personality into your name art and can tie the whole design together. Whether it’s a splash of glitter, a few playful polka dots, or intricate patterns along the edges, these details make your name art truly one-of-a-kind.
Simple Landscape Drawings for Relaxation
Creating simple landscapes can be one of the most soothing and rewarding ways to unwind. Serene natural scenes as your artistic subject matter allows you to escape into a world of calm for the moment. Whether it’s the gentle slope of a mountain, the soft glow of a sunset, or the vibrant colors of changing seasons. Regardless, drawing from nature is a way to transport you to peaceful places. Additionally, there are ways to make colored pencil drawing easy with nature as your subject. Let’s explore how to create relaxing landscapes with ease, focusing on peaceful mountain scenes. We’ll explore how to use light and shadow to add depth, and choose color palettes to reflect different seasons.
How to Draw a Peaceful Mountain Scene
Start with the outline of your mountains—simple, jagged peaks will do the trick. Don’t worry about precision; let the shape flow naturally. Use gentle curves to form the base, and layer the peaks to add dimension. A few wispy clouds drifting near the mountain tops can enhance the tranquility of the scene. Next, sketch a small lake or river at the base of the mountains. A calm body of water adds serenity and balance. You can even add a few trees in the foreground for extra detail, but keep it simple—this is all about relaxing, not stressing over the fine points. Once you’ve got the basic shapes on paper, begin adding some depth and personality through shading.
Using Light and Shadow to Create Depth
Light and shadow are the key elements that turn a flat mountain drawing into a scene with real depth. Furthermore, light and shadow are essential towards making any object in nature appear dimensional. Imagine where the sunlight is hitting the mountains, and shade the opposite sides to create dimension. Use a soft colored pencil to gently shade the slopes that are turned away from the light, blending the shadows into the base of the mountains. For the water, a slight reflection of the mountains and trees gives the scene a realistic touch. Don’t forget to add highlights to areas where the sun would naturally hit, like the tops of the peaks or ripples in the water. This contrast between light and shadow is what brings your landscape to life, making it feel almost three-dimensional. Study your mountain reference closely and have fun as you replicate the effects of nature.
Play with Color Palettes to Reflect Different Seasons
One of the most enjoyable parts of landscape drawing is choosing your color palette. The colors you use can dramatically change the mood of your drawing and transport you to a specific season. For a warm, summer scene, try using bright greens for the trees, soft blue for the sky, and vibrant yellows and oranges for the sunlit mountains. To evoke a crisp autumn day, switch to warm oranges, deep reds, and golds. Winter landscapes call for cool tones—use shades of blue, gray, and white to capture the stillness of snow-covered peaks. And for a fresh spring scene, mix light greens with pastel blossoms to create a feeling of renewal. The beauty of landscape drawing lies in its versatility, so feel free to experiment with different palettes to suit your mood. Your color palette all depends on the spectral range featured in the landscape you are viewing.
Abstract Art with Random Shapes and Colors
Abstract art is all about breaking free from the rules. It’s the perfect way to tap into your creativity without worrying as much about realism or accuracy. With random shapes and colors, you can express emotions and tell stories. Or simply enjoy the thrill of creating something entirely unique. Whether you’re a seasoned artist or a complete beginner, abstract drawing offers endless possibilities for experimentation and self-expression.
Embrace the Freedom of Abstract Drawing
Abstract drawing invites you to loosen up from the structural approach of traditional art. There are no wrong shapes, no misplaced lines, and no colors that clash. Instead, feel free to just draw what feels right in the moment. Start by letting your pencil or colored pencil roam across the page. Create organic shapes, angular forms, or even scribbles. Freedom in art lies in not having a predetermined outcome and following your instincts. Maybe your lines evolve into swirling forms, or perhaps your page becomes a series of sharp, intersecting triangles. The beauty of abstract drawing is that each piece is open to interpretation, even your own. Although abstract art is free-thinking, it still requires drawing skill. So rest assured that even in abstract art you are still learning how to draw.
How to Combine Colors for Bold, Eye-Catching Results
The colors you choose are where your abstract artwork can really come to life. Bold, contrasting colors like a vibrant red against a deep blue are visually powerful. If you’re aiming for a more harmonious feel, try analogous colors, like shades of green and blue, that flow seamlessly into one another. Layering different hues can also add depth and movement to your shapes. You can mix complementary colors for a high-impact, dramatic effect. On the other hand, you can also use monochromatic shades for a more subdued yet still striking tone. There’s no set rule, so experiment with different combinations to alter the mood of your artwork. Sometimes the most unexpected pairings of color can yield the most captivating results.
Letting Your Imagination Run Wild with Patterns
Once you’ve embraced abstract shapes and colors, take it a step further by using patterns. For instance, start with a simple shape, like circles or zig zags. It’ll turn your drawing into a mesmerizing, rhythmic piece. Play with scale, use tiny dots alongside bold, sweeping lines to create visual contrast. Geometric patterns, spirals, or even random doodles can add an extra layer of interest to your work. As with everything in abstract art, there are no boundaries. Your patterns don’t have to be symmetrical or even consistent. Allow them to flow organically from one section to the next, and see where your imagination takes you. Patterns are a wonderful way to add texture, energy, and an entirely new dimension to your abstract pieces.
Draw Your Favorite Cartoon Character in Color
There’s something truly exciting about bringing your favorite cartoon character to life with color. I speak from experience as a kid who spent hours drawing cartoons. Whether it’s a beloved character from childhood or a new favorite, the process of drawing ‘toons is both fun and rewarding. Simple shapes to achieve a likeness and selecting the right colors is the beginning. Then those final touches you to the drawing will bring your character to life.
Breaking Down Complex Characters into Simple Shapes
Drawing cartoon characters is a great way to make colored pencil drawing easy. Without cartoons, I don’t know where I’d be as an artist. When I was a little boy, I enjoyed the process of drawing them and spent endless hours at it. Due to the simplicity of cartoons, you are able to visualize their simple shapes more easily. As a result, drawing them becomes easier due to this visualization. To begin, discover the most basic shapes of your subject character. For example, Disney’s Mickey Mouse has a head that contains a few basic circles. However, The Simpsons are characters that combine both simple cylindrical and circular shapes. Practice identifying and drawing the basic shapes of your favorite character. As an artist, it’ll build your character and skill to graduate into drawing more complex subjects.
How to Get the Right Color Balance for a Lively Look
What would colored pencils be without being able to wield the power of their color, right? These are tools that represent the magic of our color spectrum, capable of displaying great visual beauty. Hence, we must use them not just as a tool for drawing lines but also a magnificent instrument of color. As an artist, you must combine your hand and eye coordination for lines and measurements with your color perception ability. Each of these visual skills require practice and are the foundation to what makes art outstanding. Begin by selecting the main colors of your cartoon character. If Garfield the cat is your subject, pick a vibrant orange with black stripes. Or maybe you’re drawing Bart Simpson. If so, choose a bright yellow for his skin. The object is to train your eye to make accurate color choices. From there, you are on your way to create rich layers of colored pencil shading and colorful works of art.
Adding Finishing Details for a Professional Touch
Now that you have learned the basics in a simple visual approach to art, progress gradually. With your simple shapes drawn and shading added, now work on the final details of your art. This part is like a baker adding the icing on a cake. Like a baker, you must step back and take a look at your work at a glance. Look around closely and target small details that will either create improvement or accuracy in your art. Ask yourself: is this line at the correct angle in comparison to another? Does the space between one shape accurately represent its distance to another shape? Is the hue, value and/or chroma of the color I shaded close enough to my subject? Using this critical visual mentality, analyze the details of your art and adjust each as needed.
Conclusion
Encouraging Consistency: Practice Makes Perfect
Make no mistake, using the colored pencil and any new art medium takes practice. Patience is one of the greatest virtues of the artist, and with it you will realize the beauty of this medium. So grab a hold of your colored pencils and let your mind run free. Realize it’s beauty as you practice using them on a fine-toothed, firm and durable acid-free paper. With each stroke of this pencil, you’ll understand it’s unique identity for color and line. When I first started using colored pencil, I was a bit uneasy. However, I kept drawing and became comfortable which eventually led me to finding my own style. With that said, use my guidance to embark on your own path of discovering your art with this tool. I look forward to hearing your experience once the colored pencil has become your go-to medium. Hopefully this guidance can help you progress faster than I did to make colored pencil drawing easy.
Your Next Steps in Exploring the World of Colored Pencil Art
Now that you’ve learned various techniques, from drawing lifelike fruit to creating serene landscapes and intricate mandalas, it’s time to dive deeper into the world of colored pencil art. Try taking on more challenging projects that push your boundaries, or revisit some of your earlier pieces to see how far you’ve come. Consider investing in higher-quality materials as your skills evolve—they can make a noticeable difference in your finished artwork. You might even explore new subjects like portraits, animals, or abstract designs. Remember, art is a journey, not a destination, and every step you take enhances your unique style. Keep drawing, keep learning, and most of all, enjoy the creative process. The beauty of colored pencils lies not only in their vibrancy but also in their versatility, making them the perfect tool for any budding artist looking to grow.
