How To Draw Anime Faces in 7 Easy Steps
How To Draw Anime Faces: An Introduction
Ever gazed upon an anime character and felt a surge of emotion, a connection so profound it defied explanation? Perhaps it was the luminous eyes, brimming with life and wonder. Or maybe it was the expressive mouth, capable of conveying a thousand words without uttering a sound. Anime faces, with their unique blend of realism and exaggeration, have the power to captivate hearts and minds. Join us on a journey to unlock the secrets behind this captivating art form. We’ll delve into the fundamental techniques of how to draw anime faces. This guide demonstrates the delicate strokes that bring eyes to life to the bold lines that shape iconic hairstyles. By the end of this guide, you’ll be equipped to create anime faces that are as expressive and evocative as the characters that inspire them.
Why Anime Faces Are So Popular
What is it about anime faces that makes them so irresistibly appealing? Is it the exaggerated features that allow for a wide range of emotions, from pure joy to deep sorrow? Or is it the ability to convey complex thoughts and feelings with a single glance? Whatever the reason, the pursuit of how to draw anime faces continues to captivate millions around the globe. Their distinctive style, coupled with their ability to evoke strong emotional responses, has made them a cultural phenomenon. From classic anime series to modern masterpieces, anime faces continue to inspire artists and fans alike.
The Basics of Anime Art Style
At the heart of anime art lies a unique aesthetic that sets it apart from other styles. Characterized by large, expressive eyes, simplified features, and dynamic poses, anime art has its own set of rules and conventions. By understanding these fundamentals, you can begin to create anime characters that are both visually striking and emotionally resonant. Whether you’re a seasoned artist or a complete beginner, learning how to draw anime faces is the first step towards creating your own captivating characters.
My Experience With Studying & Drawing Anime
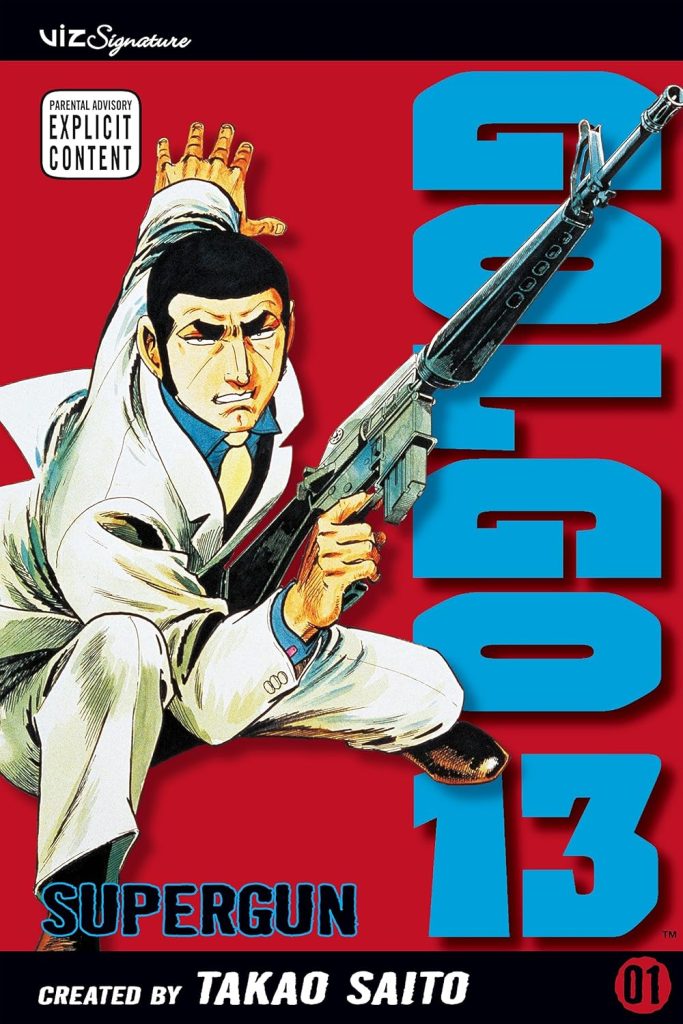
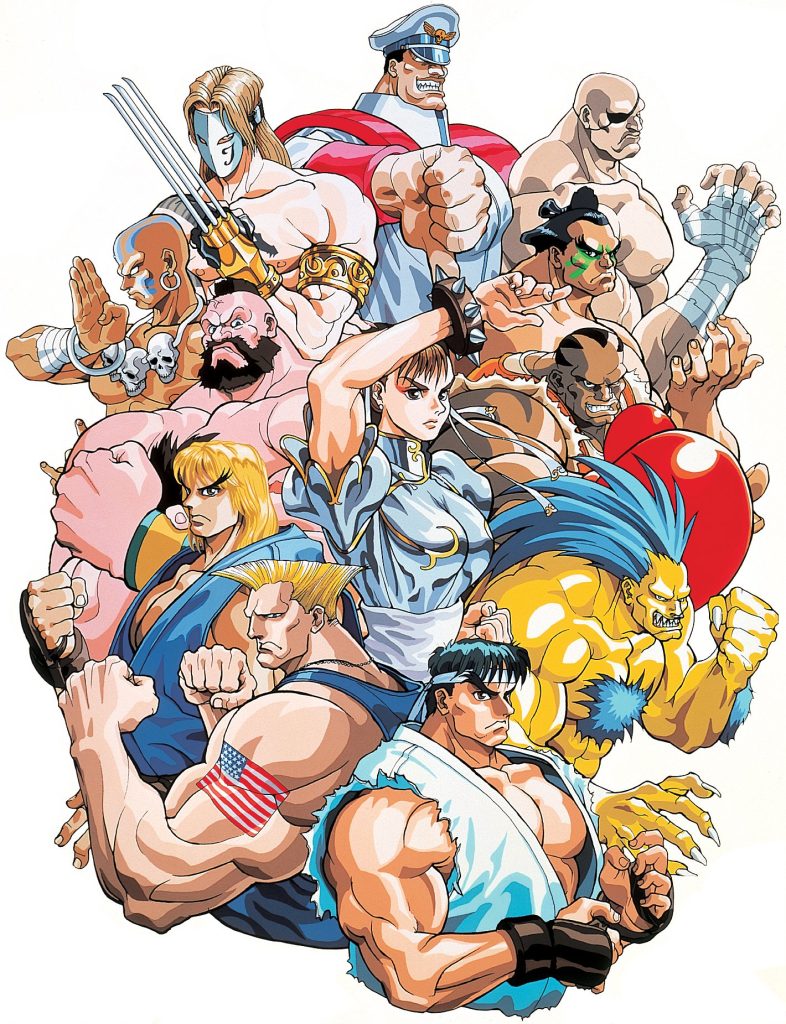
As a life-long visual artist I began drawing at about 5 years old and brought to life images from my imagination. Soon after, I began drawing the things that I liked around me which were nature and cartoons. I became exposed to the fascinating world of anime as an 80’s baby, during the dawn of Nickelodeon and Nintendo. One of my favorite Nickelodeon anime shows as a kid: The Mysterious Cities Of Gold. In addition, one of my favorite examples of anime artwork is the video game Street Fighter 2. Furthermore, these unique characters of anime were a way to approach art using easy steps on how to draw. I can’t imagine where I’d be as an artist without this resource of cartoons to draw for beginners.
Throwback Anime Childhood Memories Of The 80’s
My memories of childhood are rich with images of Golgo 13, Ninja Gaiden, Hello Kitty (from my sister), Akira and more. Most of the characters of my favorite Nintendo video games had Anime-style artwork by Japanese companies. Being an Afro-Caribbean kid from New York, it was an intriguing exposure to the culture and art of The Far East. It was such a unique approach to caricature drawing that I couldn’t help but take notice.
How Anime Influenced My Early Art Years
Although I never used anime as a primary style, I’ve always admired it. My firm belief is that anime has left an indelible imprint upon my early practice of art. I recall being fascinated at the level of detail in the drawing as I read through anime comics. Most importantly, these anime worlds created by artists gave me inspiration to expand my visual imagination. As a result, I worked harder to portray a higher level of detail in my own artwork. How I learned how to draw anime faces was by copying some of the anime characters I saw on TV, in video games and comics.
Step 1. What You’ll Need to Get Started
Before you learn how to draw anime faces, it’s essential to gather the necessary tools and materials. While you can create stunning anime faces with just a pencil and paper, investing in quality art supplies can significantly enhance your creative process. From graphite pencils to digital drawing tablets, the options are vast and varied. By selecting the right tools, you’ll be well-equipped to bring your anime characters to life.
Traditional Art Materials:
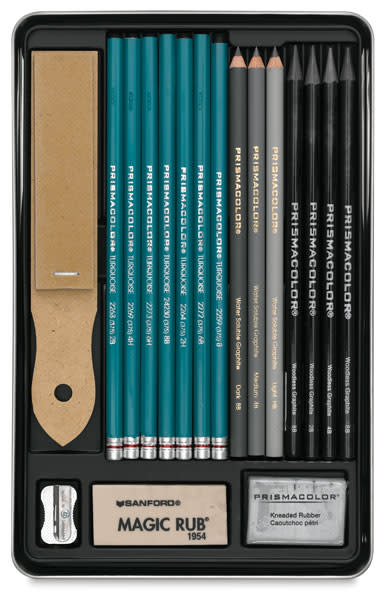
Pencils: A good set of graphite pencils is a must-have for sketching and laying down the foundation of your anime faces. Consider a set like Blick Prismacolor Graphite Sketching Pencils that offers a range of hardness (HB, 2B, 4B, etc.) for creating light lines, shading, and adding darker details.
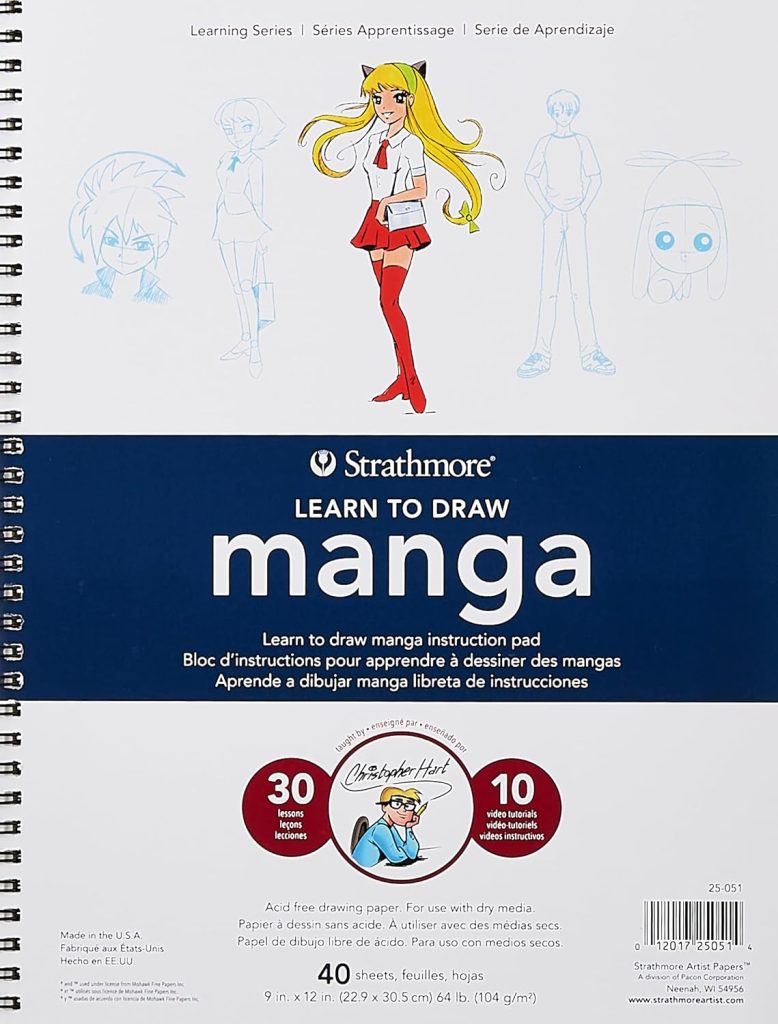
Paper: Choose a smooth yet toothy paper that can handle multiple erases and blends well. Look for sketchbooks or drawing paper specifically designed for anime and manga art, such as Strathmore Manga Drawing Paper.
Erasers: A good vinyl eraser like the Tombow Mono Zero Eraser is essential for cleaning up unwanted lines and shadows without damaging your paper.
Pencils (Optional): Once you’re comfortable with your sketches, consider outlining your drawings with inking pens. Popular choices include Copic Multiliner SP Pens with various tip sizes for creating thin and thick lines, or micron pens like Sakura Pigma Micron Pens known for their consistent ink flow and precise lines.
Digital Art Supplies (Optional):
Drawing Tablet: If you’re interested in creating digital anime art, a drawing tablet can be a game-changer. These tablets connect to your computer and allow you to draw directly on a digital canvas with a pressure-sensitive pen, mimicking the feeling of traditional drawing. The Wacom Intuos Drawing Tablet is a popular choice for beginners.
Digital Art Software: There are many software programs available for creating digital art, some free and some with paid subscriptions. Popular options include Clip Studio Paint, Adobe Photoshop, and Krita. These programs offer a wide range of brushes, textures, and effects specifically designed for anime and manga art.
Step 2: Sketching the Facial Features
Now that we’ve established the foundation of our anime face, it’s time to bring it to life with expressive features. Let’s start with the eyes, the soul of any anime character.
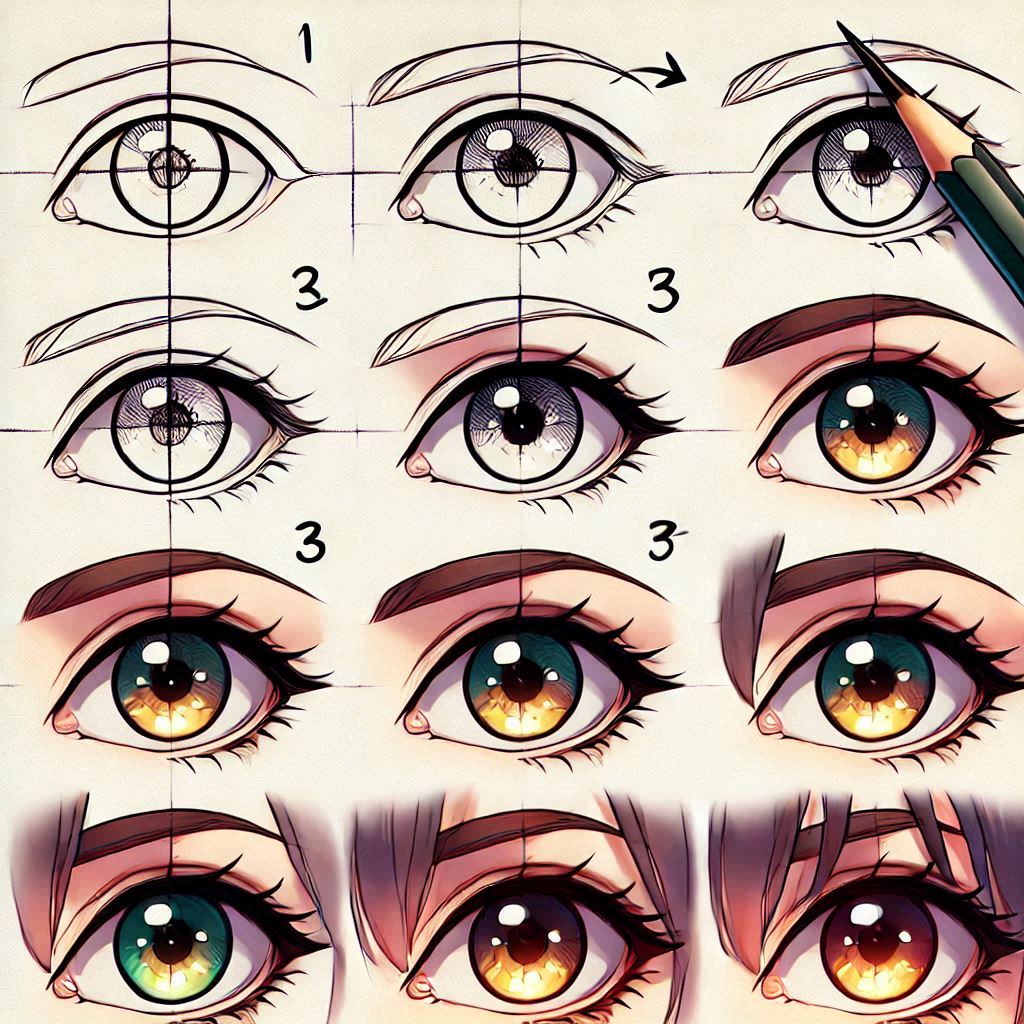
Eyes: The Window to the Soul
Anime eyes are iconic for their large size and expressive nature. They can convey a wide range of emotions, from joy and excitement to sorrow and anger. To draw captivating anime eyes, start by sketching two almond-shaped outlines. Next, add the iris and pupil, paying attention to the direction of the gaze. To enhance the expressiveness of your eyes, consider adding details like eyelashes, tear ducts, and catchlights. Remember, the eyes are the focal point of your drawing, so take your time to perfect them.
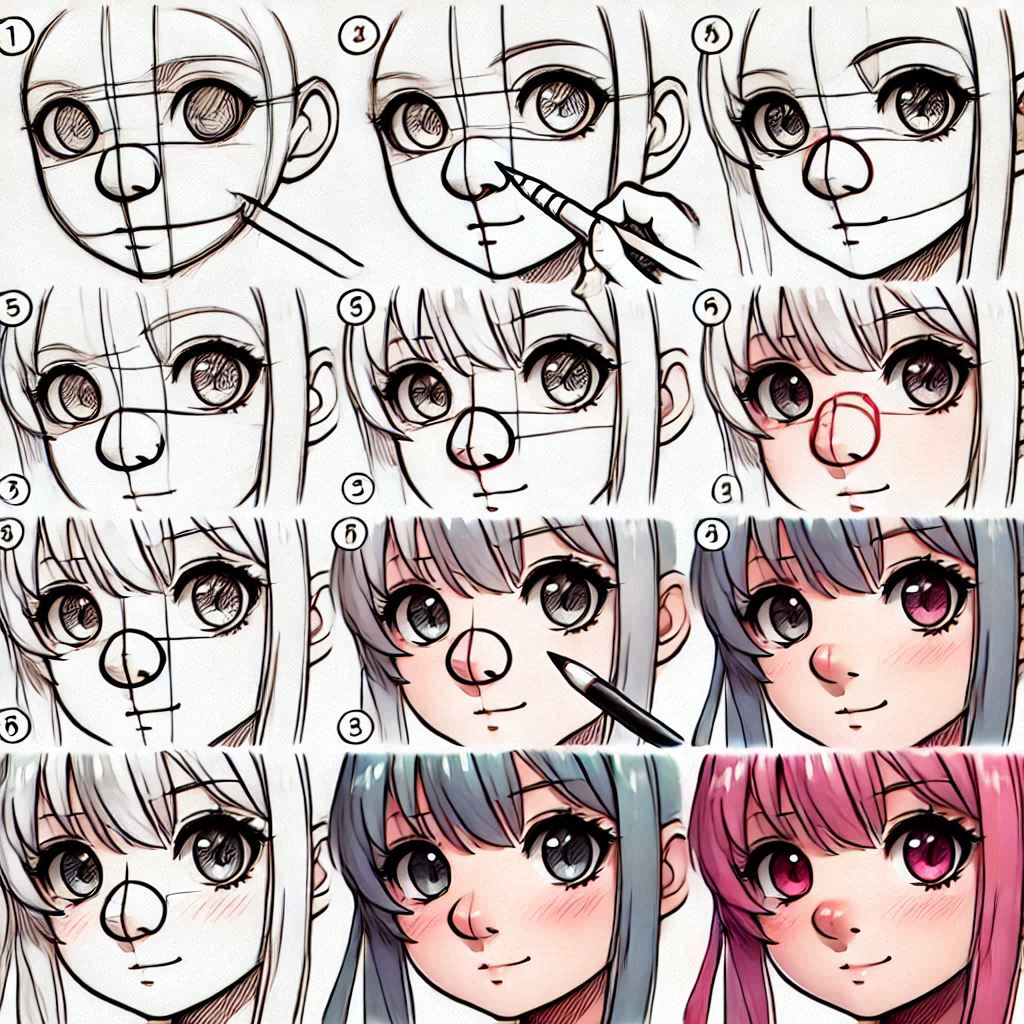
Noses: Small and Subtle
Unlike real-life noses, anime noses are typically quite small and simple. They’re often represented by a short line or a simple curve. However, don’t underestimate the power of a well-drawn nose. Even a subtle nose can add depth and dimension to your character’s face. When drawing anime noses, focus on their placement and angle, as these can influence the overall expression of your character.
Mouths: A Range of Expressions
The mouth is another crucial feature that can convey a wide range of emotions. From a simple smile to a complex frown, the mouth can tell a story without words. To draw anime mouths, start by sketching a basic shape, such as a line or a curve. Then, add details like lips, teeth, and tongue. Remember to consider the character’s expression when drawing the mouth. A small, upturned mouth can convey happiness, while a downturned mouth can suggest sadness or anger.
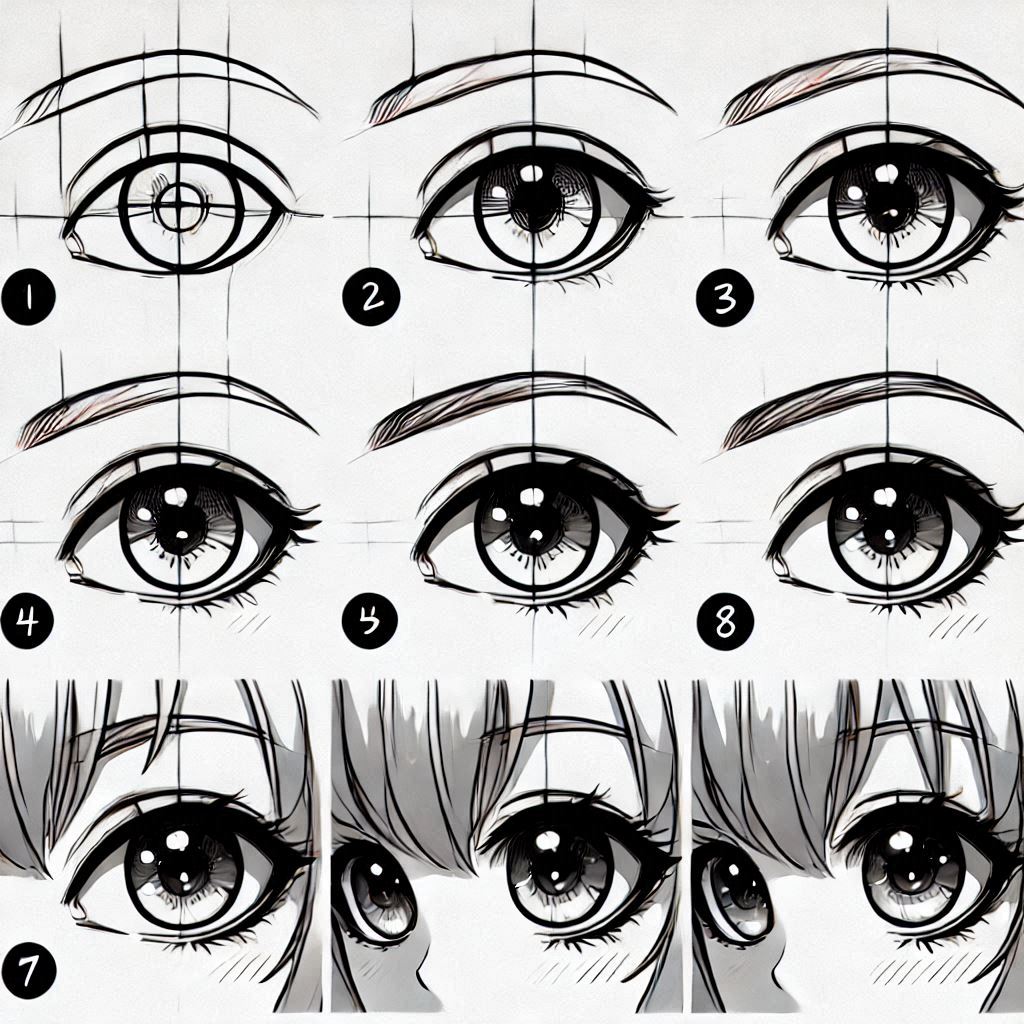
Step 3: Mastering the Eyes
As we’ve already discussed, the eyes are the most expressive feature of an anime face. To truly master the art of drawing anime eyes, we need to delve deeper into their anatomy and explore the various techniques for creating different looks.
The Anatomy of an Anime Eye
While anime eyes may seem simple at first glance, they have a complex structure. A typical anime eye consists of the following elements:
- Iris: The colored part of the eye.
- Pupil: The black circle in the center of the iris.
- Eyelashes: The tiny hairs that frame the eye.
- Eyelid: The skin that covers the eye.
- Tear Duct: A small, triangular shape near the inner corner of the eye.
- Catchlight: A small, bright spot that adds shine and realism to the eye.
By understanding the anatomy of an anime eye, you can create more realistic and expressive characters. Hence, anime eyes are one of the most fundamental aspects of learning how to draw anime faces.
Creating Different Eye Shapes and Sizes
One of the great things about anime is the wide variety of eye shapes and sizes. By experimenting with different shapes, you can create characters with distinct personalities. Here are a few popular eye shapes:
- Round Eyes: These eyes convey innocence and youthfulness.
- Almond-Shaped Eyes: These eyes are more mature and sophisticated.
- Sharp Eyes: These eyes are often associated with cunning and intelligence.
- Wide Eyes: These eyes can express surprise, shock, or fear.
By adjusting the size of the eyes, you can also influence the overall mood of your character. Larger eyes tend to be more expressive, while smaller eyes can convey a more subdued or mysterious personality.
Adding Sparkle and Shine
To make your anime eyes truly captivating, add a touch of sparkle and shine. This can be achieved by adding a small, bright spot, known as a catchlight, to the eye. The placement and size of the catchlight can significantly impact the overall expression of the character. A high-placed catchlight can suggest a sense of wonder or surprise, while a low-placed catchlight can convey a more serious or thoughtful mood.
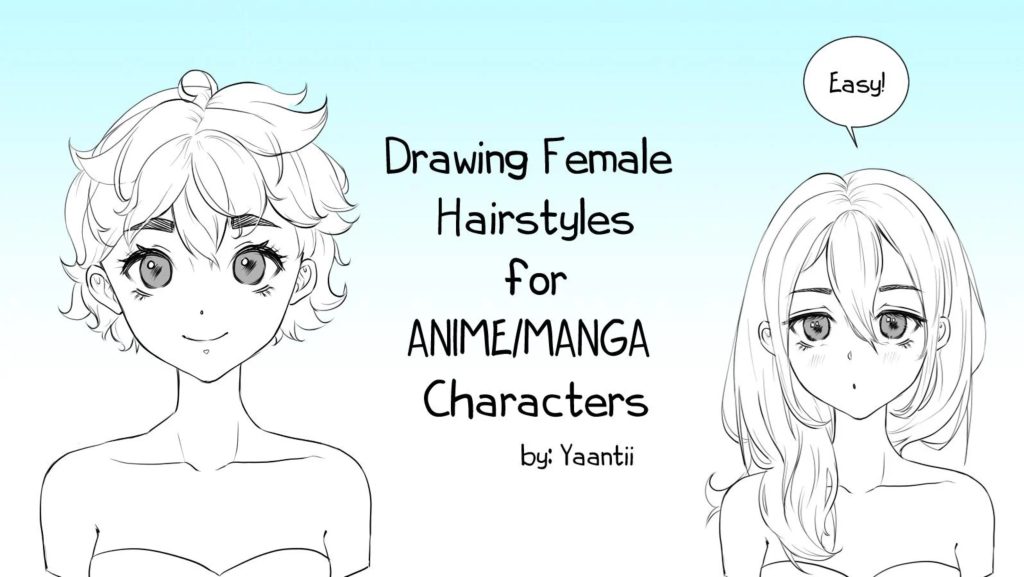
Step 4: Perfecting the Hair
Hair is another essential element of an anime character’s design. It can be used to convey personality, age, and social status. In this step, we’ll explore some basic hair styles and techniques for adding texture and volume. Want to take your anime hair game to the next level? “How to Draw Female Hairstyles: Anime and Manga Basics” is a comprehensive course on anime hair drawing. It dives deep into various hair types, textures, and techniques. In this course, you’ll gain the skills to create truly expressive and unique hairstyles for your anime characters.
Basic Hairstyles: Straight, Wavy, and Curly
One of the simplest hairstyles to draw is straight hair. To create straight hair, simply draw long, flowing lines. For wavy hair, add gentle curves to the lines. Curly hair can be achieved by drawing a series of S-shaped curves. Remember to consider the character’s personality when choosing a hairstyle. A spiky hairstyle might suit a rebellious character, while long, flowing hair might be more appropriate for a gentle and kind character.
Adding Texture and Volume
To make your anime hair more realistic, add texture and volume. This can be achieved by using a variety of techniques, such as hatching, cross-hatching, and stippling. Hatching involves drawing parallel lines to create shading. Cross-hatching involves drawing lines in different directions to create darker areas. Stippling involves creating dots to create shading. By combining these techniques, you can create a wide range of textures, from smooth and silky to rough and wild.
Creating Dynamic Hair Flows
To make your anime hair more dynamic, consider the direction of the wind or the character’s movement. Hair can flow in any direction, adding a sense of motion and energy to your drawing. When drawing flowing hair, use long, sweeping lines to create a sense of movement. You can also add details like windswept strands and flying hairs to further enhance the dynamic effect.
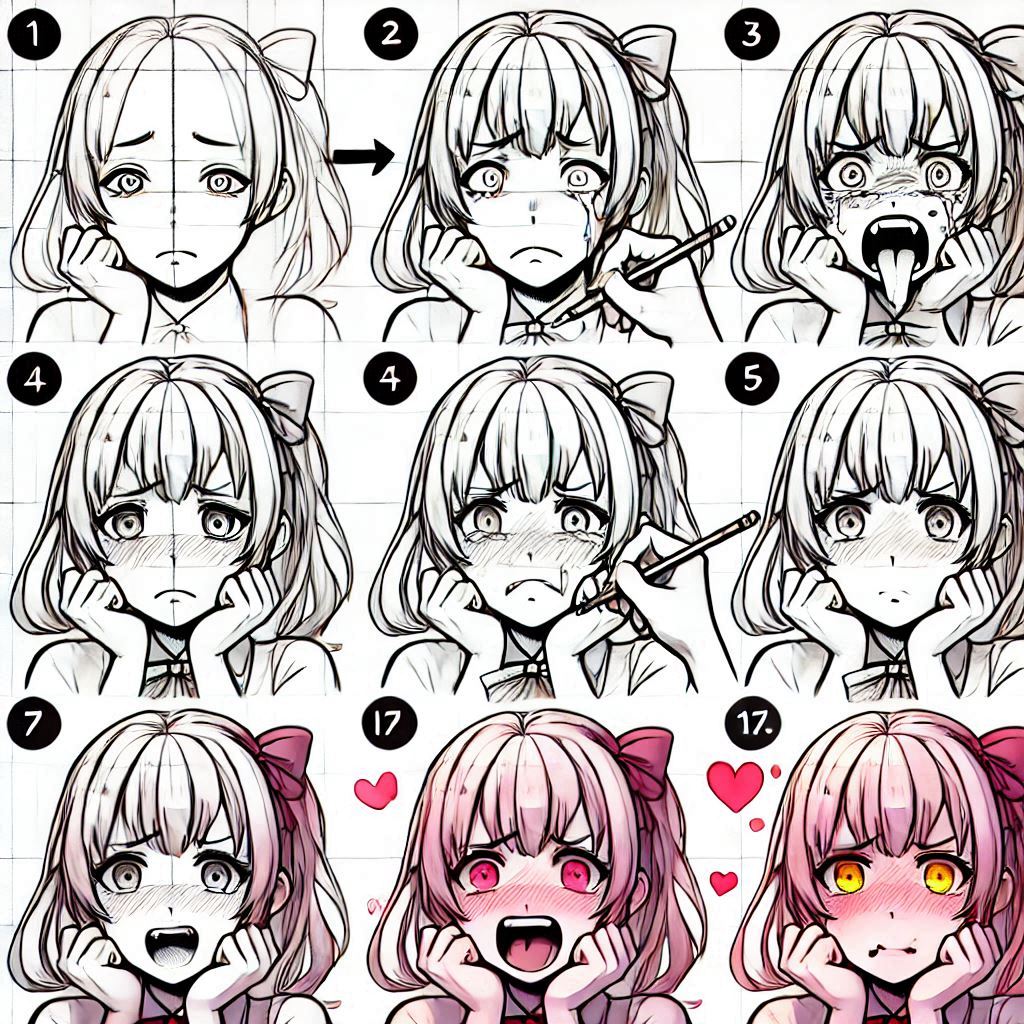
Step 5: Adding Expressions
Now that we’ve mastered the fundamentals of learning how to draw anime faces, it’s time to delve into the realm of emotions. By manipulating facial features, we can convey a wide range of feelings, from joy to sorrow and everything in between.
Happy, Sad, Angry, and More
The basic emotions are relatively straightforward to depict. A simple upturned mouth and wide eyes can convey happiness, while a downturned mouth and furrowed brows can express sadness. Anger can be shown through narrowed eyes, clenched teeth, and a furrowed brow. By combining these elements, we can create a variety of expressions.
Combining Expressions for Complex Emotions
To create more nuanced and complex emotions, we can combine basic expressions. For example, a character who is both happy and nervous might have a wide smile and slightly trembling eyes. A character who is both angry and sad might have a downturned mouth and narrowed eyes. By experimenting with different combinations of expressions, we can create characters that feel genuine and relatable.
Exaggerating Expressions for Dramatic Effect
One of the hallmarks of anime is its ability to exaggerate emotions for dramatic effect. By exaggerating facial features, we can create characters that are both striking and memorable. For instance, a character who is extremely surprised might have their eyes wide open and their mouth agape. A character who is deeply sorrowful might have tears streaming down their face and a look of despair in their eyes. By pushing the boundaries of expression, we can create truly iconic anime characters.
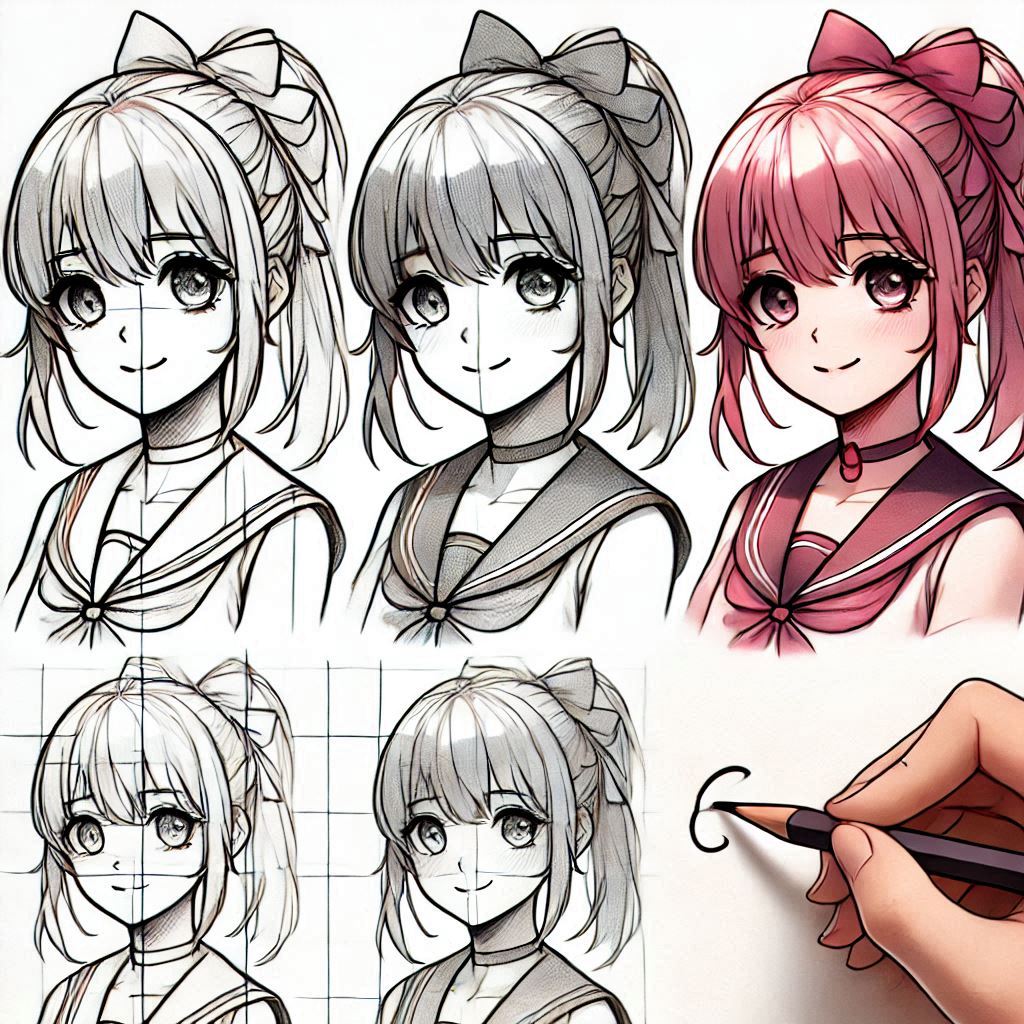
Step 6: Shading and Highlighting
Now that we’ve explored the fundamentals of drawing anime faces and adding expressions, it’s time to add depth and dimension to our artwork through shading and highlighting. These techniques will help to define the form of the face and create a sense of realism.
The Basics of Shading
Shading is the process of adding darkness and lightness to a drawing to create the illusion of form and depth. In anime, shading is often used to emphasize the contours of the face and hair. There are several techniques for shading, including hatching, cross-hatching, and blending. Experiment with different techniques to find what works best for your style.
Creating Depth with Shadows
Shadows are essential for creating depth and realism in a drawing. By adding shadows to the face, you can emphasize the contours of the nose, cheeks, and chin. To create shadows, use a darker pencil or marker to shade the areas that would naturally be darker, such as the areas under the nose, chin, and hair.
Adding Highlights for a Polished Look
Highlights are small, bright spots that can add a sense of shine and realism to your drawing. They can be used to emphasize the anime eyes, hair, and skin. To add highlights, use a white gel pen or a kneaded eraser to gently lift the paper and reveal the white underneath. By strategically placing highlights, you can create a more polished and professional-looking drawing.
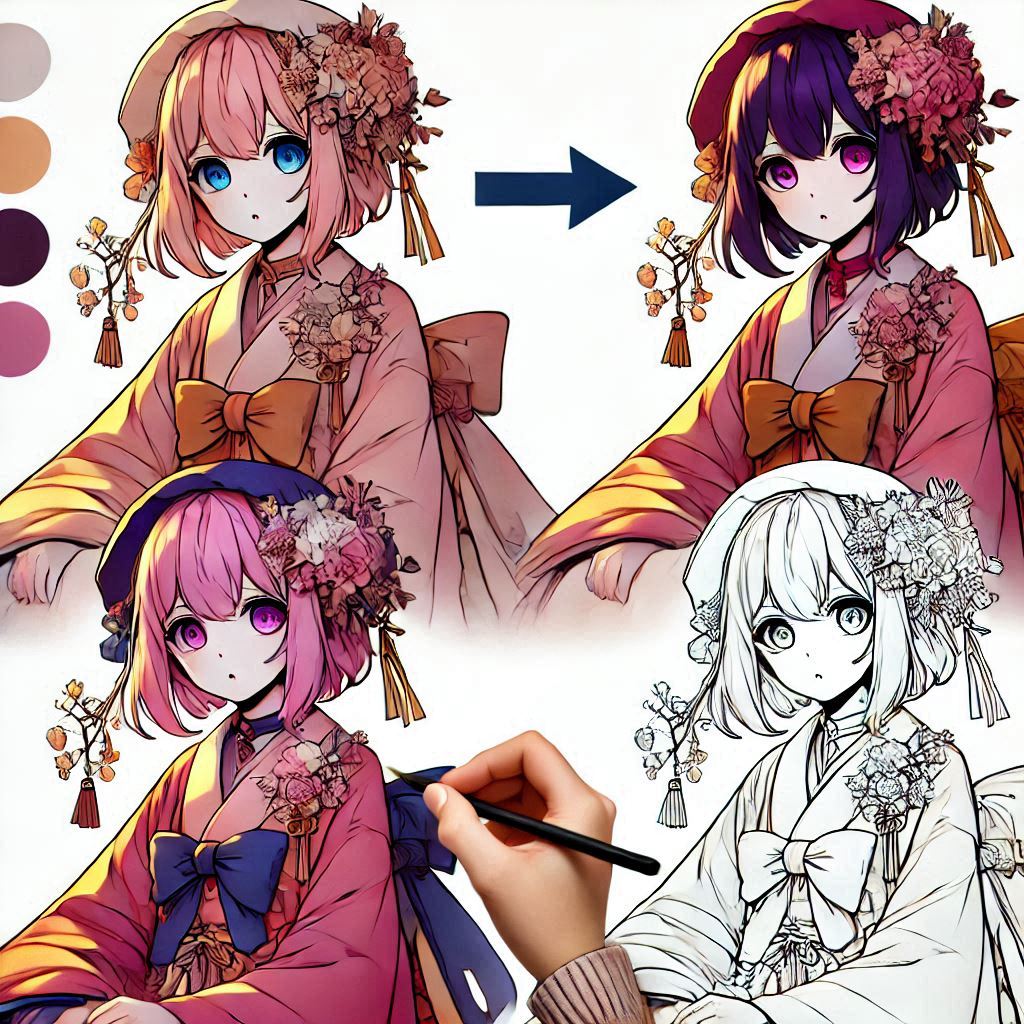
Step 7: Coloring Your Anime Face
Now that you’ve mastered the fundamentals of drawing anime faces, it’s time to add a splash of color! Coloring your artwork can bring it to life and elevate it to the next level.
Choosing the Right Colors
Choosing the right colors for your anime character can be a daunting task. However, with a little knowledge of color theory, you can create harmonious and visually appealing color palettes. Start by considering the overall mood and atmosphere you want to convey. For example, warm colors like red, orange, and yellow can evoke feelings of warmth and excitement, while cool colors like blue, green, and purple can create a more calming and serene atmosphere.
Using Color Theory to Create Harmonious Palettes
Color theory is the study of how colors interact with each other. By understanding the basic principles of color theory, you can create color palettes that are both visually appealing and emotionally resonant. One popular color scheme is complementary colors, which are colors that are opposite each other on the color wheel. For example, red and green, blue and orange, and yellow and purple are 1 complementary colors. Another popular color scheme is analogous colors, which are colors that are next to each other on the color wheel. For example, blue, green, and yellow are analogous colors. By experimenting with different color schemes, you can create a wide range of looks for your anime characters.
Digital vs. Traditional Coloring Techniques
There are two main methods for coloring your anime art: digital and traditional. Digital coloring involves using software like Adobe Photoshop or Clip Studio Paint to color your artwork. This method offers a high degree of flexibility and control, allowing you to experiment with different colors, textures, and effects. Traditional coloring, on the other hand, involves using physical materials like colored pencils, markers, or paints. This method can be more time-consuming, but it can also be very rewarding. By experimenting with different techniques, you can find the method that best suits your style and preferences.
Conclusion
Congratulations! You’ve made it to the end of this guide. By following these steps, you should be well on your way to creating stunning anime faces. Remember, practice is key. The more you draw, the better you’ll become.
Practice Makes Perfect
As with any skill, practice is essential in your journey of learning how to draw anime faces. The more you draw, the more comfortable you’ll become with the techniques and styles. Don’t be afraid to experiment and make mistakes. Every mistake is an opportunity to learn and grow.
Sharing Your Art with the World
Once you’ve mastered the basics, why not share your art with the world? There are many online communities where you can connect with other artists, share your work, and get feedback. Social media platforms like Instagram, Twitter, and DeviantArt are great places to showcase your art.
Continuing Your Anime Art Journey
The world of anime art is vast and ever-evolving. There are countless techniques and styles to explore. As you continue your journey, don’t be afraid to push your boundaries and experiment with new ideas. Whether you’re drawing manga, creating original characters, or simply sketching for fun, the possibilities are endless.
So, grab your pencils and let your creativity soar!
